(206) 258-6676

Exterior Painting Prep Checklist
When hiring a professional painting firm, the preparation is just as important as the painting itself. Here is a brief list of preparation steps you should look for and ask about on your exterior painting estimate to ensure a job well done.
1. Thorough walk-through / inspection
It may sound obvious, but it’s important! Prior to painting a house, there are several factors that must be considered. Is there any rot / damage? If so, wood repair may need to be worked into your painting bid. Was your home built before 1978? If so, your home’s exterior may contain lead-based paint, and will require extra care in the preparation steps.
As a customer service-driven company, the initial walk-through is especially important for Sound Painting Solutions. We want to learn all about your needs and expectations to deliver the best customer experience and final product as possible!
2. Product / color selection.
After thoroughly examining the job, it is time to select the appropriate products and finishes. We typically paint exteriors using a “Low Lustre” sheen, which has a lightly reflective finish. We are happy to offer the full line of Benjamin Moore Exterior products, including Ultra Spec EXT, Regal Select High Build, and Aura. In addition, if our client has not already done so, it is time to select colors as well. After the job is complete, we leave behind any extra paint in labeled containers for our clients’ convenience.
2. Pressure washing
Pressure washing removes dirt, mold and mildew to help paint adhere to the surface. A cleaning solution like Benjamin Moore CLEAN may also be used to clean especially dirty areas.
3. Site protection
Site protection involves covering landscaping, flowers, walkways, etc. It also involves trapping the paint chips that fall when scraping. Trapping paint chips is especially important on jobs where lead paint is present, as exposure to lead-based paints can be harmful and should be avoided. If your home was built before 1978, your house likely contains lead-based paint. Only contractors certified by the EPA or the state’s Renovation, Repair, and Painting program are permitted to work on homes containing lead. Read more about lead-based paint here.
4. Caulking around windows and cracks
Caulking helps prevent cracks in the surface from collecting water, causing mildew and decreasing the life of your paint job. It cracks & windows and patching small holes helps “weatherize” your home by further protecting it from the elements. However, the bottom of the siding should not be caulked! This area actually allows the moisture to escape and allows the house to “breathe.” Applying caulking prevents this and does more harm than good.
5. Scraping delaminated paint
All failing paint, including peeling and bubbling areas should be scraped from the substrate. Removing the loose paint exposes the bare surface and allows for better adherence of the new paint. This process can include scraping with a putty knife or sanding. Again, extra precautions are necessary if your home contains lead-based paint.
6. Spot-priming exposed substrate
After scraping and exposing the bare surface, these areas should be primed to help for adherence of the paint. Unfinished wood should always be primed, so if you have never painted your home before, it is a good idea to apply one full coat of primer. Caulked areas should be primed as well. Pre-tinted primer is very helpful as it allows the paint to cover with less coats. We typically have our primer tinted at 50% of our client’s desired finish color. If you are completing a DIY project, just ask your paint store and they can do this for you, too! Read more about primer on our previous blog post.
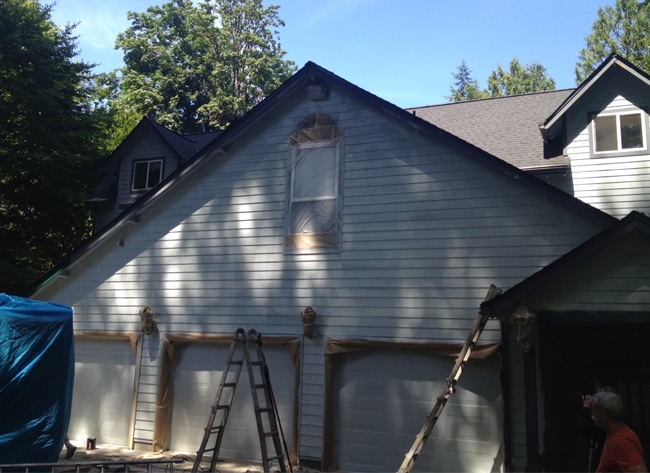
7. Masking windows
Masking protects the windows and other necessary areas from overspray, as we typically use an airless sprayer to apply paint more evenly and efficiently to exterior substrates. When using an airless sprayer, back-brushing is often an important step in the actual painting process.
8. Job cleanup
Cleanup will take place after all of the painting work is complete. All paint chips should have been captured and disposed of, and all areas should be de-masked. Now, it’s time to take a step back and admire your transformed home! When working with Sound Painting Solutions, we will thoroughly clean up the job site and of course, leave you with any extra paint for future use or reference.
Comments
Well explained article which you shared with us about exterior-painting-preparation. Thanks for sharing this great post with us. Stay with us, please!
I’m considering having a painter come and paint the outside of my house a darker color to help it look less like literally everyone else on the block and I wanted to know how to prep for it. I appreciate your tips, and I don’t think that my house has lead paint, though I’ll be sure to check so I know if I need an EPA certified painter. Your power wash tip is also a great idea, and I’ll have to ask the painters in my area if they provide that or have any recommendations.
Thanks for your comment, Rhianna! Glad it was helpful, and good luck!