(206) 258-6676


Recent Lead Renovation Job
Summer 2014 Featured Project:
Wallingford Lead Renovation
Painting Preparation
The initial preparation involved pressure washing the entire house. The rest of the preparation involved before painting was very intensive, involving stripping and priming the old surfaces, along with lead-safe precautions as a result of the age of the old paint. After the house dried from pressure washing, we applied a caulking sealant to joints and seams on the surface. For the lower stucco portion of the house, we filled any holes we found and then applied a clear, water-proofing sealant. We also filled any areas on the siding where wood-rot was found with wood-filler and sanded to create a smooth, like-new surface. We also replaced several siding boards at the front of the house that were in need.
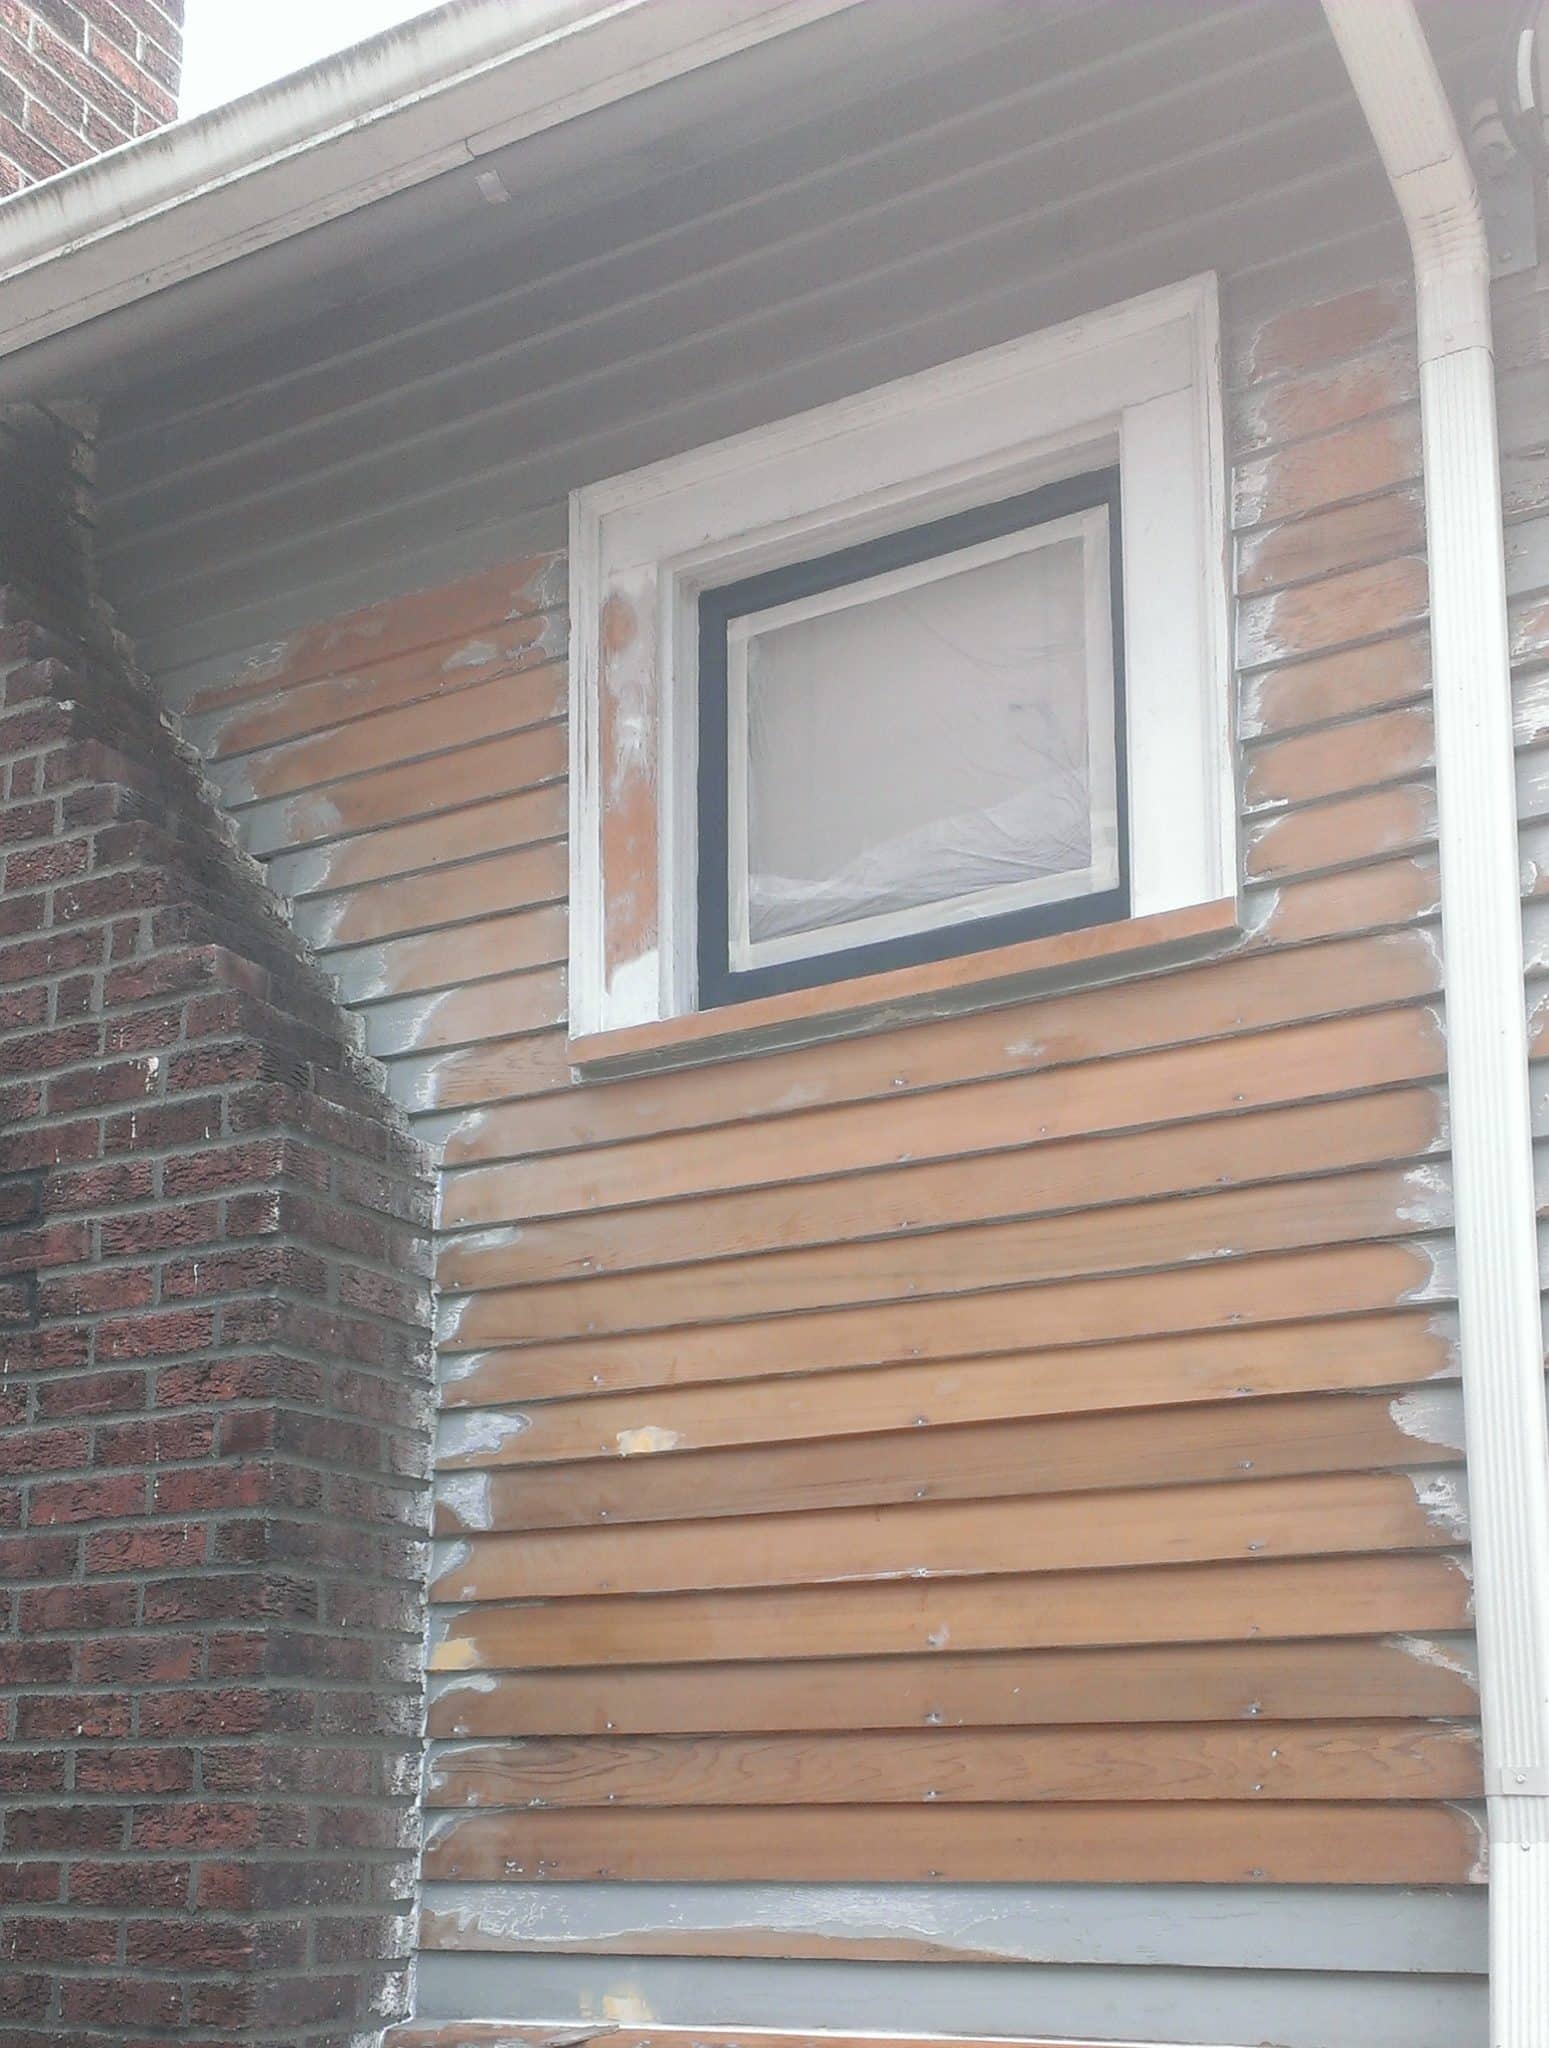
Stripped surface
Creating the Ideal Painting Surface
The most unique and time-consuming aspect of the job was completely stripping about 80% of the house’s siding to the raw wood underneath. By implementing a new tool, the PaintShaver Pro, we were able to efficiently strip the siding to bare wood without causing damage. Removing bubbling, old layers of paint allowed us to create the most ideal situation for applying new coats of primer and paint, ensuring the longevity of the new paint job. Next, we spent a few days finish-sanding the shaved areas, to create a smooth and even surface for application of the new paint.
Lead-Safe Precautions
As our client had an older home (i.e. built before 1978), we had to take extra precautions to avoid exposure to old, lead paint and ensure compliance with EPA regulations.
The presence of lead paint presented challenges in the restoration process. To prevent lead contamination, we laid out plastic in all directions and collected shavings from our tools using HEPA vacuum attachments. In addition, Sound Painting Solutions team members wore heavy suits in the hot summer weather to avoid exposure to the paint.
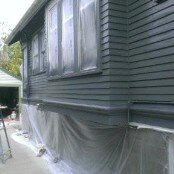
Painting in progress
Getting to Business
After the majority of the house was stripped to bare wood, we applied a Benjamin Moore primer product to protect the wood and ensure proper adhesion of the new paint. We used an oil-based primer to penetrate deeply into the wood. We also asked our paint store to pre-tint the primer to the color of paint, for better coverage. Finally, after priming, we applied two coats of low-lustre Aura, Benjamin Moore’s top-of-the-line exterior paint.

The completed job
Final Results
While the process was long and sometimes even grueling in the summer heat, the results we achieved made all of the effort and cost worth it, both for us and our happy clients. We know that doing the job the long way is doing the job the right way. Our clients will be able to enjoy the newly restored beauty of their home for years to come!
See more photos of this project on our Houzz profile.
Contact Sound Painting Solutions today for a free bid on your Seattle interior or exterior painting project! When you call Sound Painting Solutions, you will receive a detailed bid outlining preparation, the scope of painting work, and details on quality paint products that will be used on your home. Call us now at (206) 258-6676, or contact us using the form to the right. Sound Painting Solutions is a Lead-Safe Certified Firm.
Photos by Sound Painting Solutions employee Tony Kelley.